
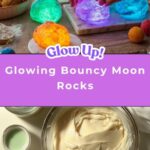
If you have ever dreamed of bringing a little piece of outer space right into your home, then get ready to have some serious fun with the Glowing Bouncy Moon Rocks: Craft Your Own Fun Space Decor Recipe. These whimsical, glowing little orbs aren’t just visually captivating; they bounce, squish, and glow in the dark, making them perfect for everything from kids’ playtime to eye-catching space-themed decorations. The combination of bright colors and that satisfying bounce is like having a mini galaxy at your fingertips. Trust me, once you make these, you’ll want to craft a whole cluster of your own glowing moon rocks to brighten up any room or party.
Ingredients You’ll Need
Preparing Glowing Bouncy Moon Rocks is surprisingly simple, and each ingredient plays a crucial role in creating that perfect glow, bounce, and tactile delight. From the base glue that ensures stretchiness to the glow paint that makes them truly magical, every component adds something special.
- White glue (1 cup): This is the essential base that gives your moon rocks their stretchy, squishy texture.
- Liquid starch (1 cup): Acts as a natural activator, transforming the glue into a bouncy, moldable material.
- Food coloring (a few drops): Adds vibrant hues to your moon rocks, making them look like colorful lunar stones.
- Glow-in-the-dark paint: The magic ingredient that makes your moon rocks illuminate after the lights go out.
- Water (small amount): Used to thin the glow paint for an even coating over your rocks.
- Wax paper or silicone mat: A non-stick surface to dry your glowing creations.
How to Make Glowing Bouncy Moon Rocks: Craft Your Own Fun Space Decor Recipe
Step 1: Mix the Base Ingredients
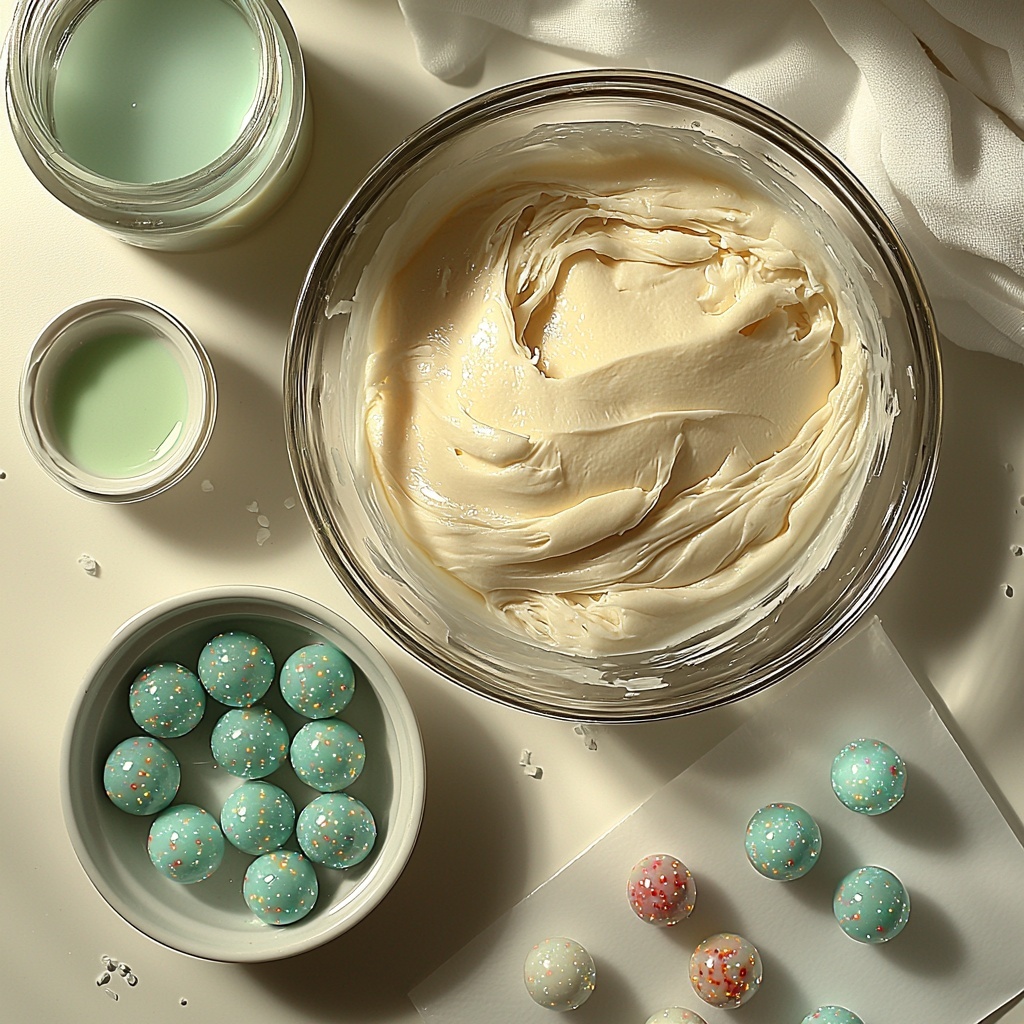
Start by combining 1 cup of white glue with 1 cup of liquid starch in a mixing bowl. Stir them together thoroughly until you get a smooth, sticky blend. This mixture is the foundation of your moon rocks, creating that lovely stretch and bounce that makes them so addictive to handle.
Step 2: Add Your Color
If you want to give your moon rocks some personality, now’s the time to add a few drops of your favorite food coloring. Mix it in until the shade is just right. You could go with classic space hues like deep blues and purples or bright neon colors for a fun twist.
Step 3: Knead to Perfect Consistency
Once your mix is combined, it’s time to get hands-on. Knead the concoction with your fingers until it turns smooth and elastic. This step is where the magic really begins—the mixture transforms from gooey slime into soft, moldable spheres.
Step 4: Prepare the Glow Paint Coating
In a separate bowl, mix your glow-in-the-dark paint with a small amount of water. This thins out the paint, making it easier to coat your moon rocks evenly without clumping or streaking.
Step 5: Shape and Glow
Roll the kneaded mixture into small balls—these will be your moon rocks. Then, carefully dip each ball into the thinned glow paint, ensuring every surface is evenly covered. This glowing shell is what will make your moon rocks light up beautifully in the dark.
Step 6: Dry and Enjoy
Place your freshly coated moon rocks on wax paper or a silicone mat and let them dry for several hours. Once dry, you’ll have your very own glowing, bouncy moon rocks ready for playtime, display, or gifting to space enthusiasts of all ages.
How to Serve Glowing Bouncy Moon Rocks: Craft Your Own Fun Space Decor Recipe
Garnishes
While these moon rocks are primarily a craft and toy, you can sprinkle a little extra glitter or metallic paint dust on them before drying for a galaxy-inspired shimmer that mimics stardust. Adding tiny star-shaped stickers or using glow powder mixed into the paint are also fun garnishing ideas that elevate your space decor effect.
Side Dishes
Pair your glowing moon rocks with other fun space-themed crafts or treats to create a cosmic atmosphere. Think along the lines of star-shaped sugar cookies, moon crater cupcakes, or even a constellation-inspired drink station for a complete, immersive experience.
Creative Ways to Present
Display your glowing moon rocks in a clear jar or glass bowl with tiny LED lights hidden underneath to amplify their glow during the day. For parties, scatter them around dark corners or place them inside balloons for a surprising glowing effect. You can also string them on a wire to create a “moon rock” garland that doubles as décor and a fun toy.
Make Ahead and Storage
Storing Leftovers
Keep your Glowing Bouncy Moon Rocks fresh by storing them in an airtight container or zip lock bag at room temperature. This prevents them from drying out and keeps the glow paint intact for continued fun.
Freezing
Freezing isn’t recommended as it can change the texture, making the rocks stiff and less bouncy once thawed. It’s best to enjoy these moon rocks fresh or within a few days of making.
Reheating
If your moon rocks firm up over time, gently knead them to restore some softness. Avoid heat sources like microwaves or ovens as they can damage the paint and alter texture.
FAQs
Can I use different types of glue for this recipe?
White school glue works best because of its texture and chemical makeup, ensuring the right stretchy consistency. Other glues might not provide the same bounce or could be unsafe for kids.
Is the glow-in-the-dark paint safe for children?
Most glow-in-the-dark paints are non-toxic, but it’s always a good idea to check the label and supervise kids during crafting to avoid ingestion or contact with eyes.
How long do the moon rocks glow after being charged by light?
Depending on the glow paint quality, the moon rocks can shine brightly for up to 30 minutes in darkness, gradually fading but still visible for a few hours.
Can I make moon rocks without glow paint?
Absolutely! Even without glow paint, these bouncy rocks are super fun to play with and can be customized with any colors you like for a different look.
Will the moon rocks dry out or get sticky over time?
If stored properly in airtight containers, your moon rocks should maintain their texture for several days. If they do start drying, kneading them or adding a tiny bit of liquid starch can help restore their feel.
Final Thoughts
I can’t recommend the Glowing Bouncy Moon Rocks: Craft Your Own Fun Space Decor Recipe enough. Whether you’re looking for a delightful craft project, a creative decoration, or a new toy for kids, these radiant, bouncy orbs tick every box. So grab your ingredients, get your hands messy, and let your creativity blast off into the cosmos—your own glowing moon rocks are waiting!
Print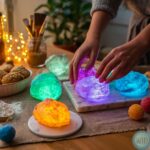
Glowing Bouncy Moon Rocks: Craft Your Own Fun Space Decor Recipe
- Prep Time: 10 minutes
- Cook Time: 3 hours drying time
- Total Time: 3 hours 10 minutes
- Yield: Around 10-12 small moon rocks
- Category: Kids Craft / Toy
- Method: No-Cook
- Cuisine: N/A
Description
Create fun and colorful glowing bouncy moon rocks perfect for space-themed decorations or as an entertaining toy for kids. These moon rocks are made from glue and liquid starch, colored with food dye, and coated with glow-in-the-dark paint to provide a squishy texture and a luminous effect in the dark.
Ingredients
Moon Rock Base
- 1 cup white glue
- 1 cup liquid starch
Coloring
- Few drops of food coloring (optional)
Glow Effect
- Glow-in-the-dark paint (enough to coat the moon rocks)
- Small amount of water to thin paint
Instructions
- Mix Glue and Starch: In a mixing bowl, combine 1 cup of white glue with 1 cup of liquid starch. Stir until well mixed to form the base mixture.
- Add Color (Optional): If you want colored moon rocks, add a few drops of food coloring to the mixture and stir until the color is evenly distributed.
- Knead the Mixture: Once combined, knead the mixture with your hands until it becomes smooth, stretchy, and easy to shape.
- Prepare Glow Paint: In a separate bowl, mix glow-in-the-dark paint with a small amount of water to thin it out for better coating.
- Shape and Coat: Roll the kneaded mixture into small balls, then dip each ball into the thinned glow-in-the-dark paint to coat them evenly.
- Dry the Moon Rocks: Place the coated balls on wax paper or a silicone mat and allow them to dry for several hours until the paint sets.
- Ready to Use: Once dry, your glowing bouncy moon rocks are ready to be played with or used as decorative pieces.
Notes
- Adjust the amount of food coloring to create your desired hue.
- Ensure the moon rocks are fully dry before handling to prevent paint smudges.
- Store moon rocks in a sealed container to keep them fresh and pliable.
- Supervise children during the making process, as the materials are not edible.
- You can reactivate the glow by exposing the moon rocks to light for a few minutes before playing in the dark.


