
If you love cookies that are as delightful to look at as they are to eat, then this Simple Red Velvet Cream Cheese Thumbprint Cookies Recipe is an absolute must-try. These treats combine the lush, velvety flavor of classic red velvet with the irresistible creaminess of a rich cream cheese filling, all nestled in a soft, buttery cookie. Perfect for holidays, special occasions, or just when you need a little sweetness in your day, this recipe is straightforward and incredibly rewarding. Imagine sinking your teeth into a cookie that’s tender yet perfectly structured, with a tangy cream cheese center that balances the sweetness beautifully. Once you make these, they’ll quickly become a staple in your baking repertoire.
Ingredients You’ll Need
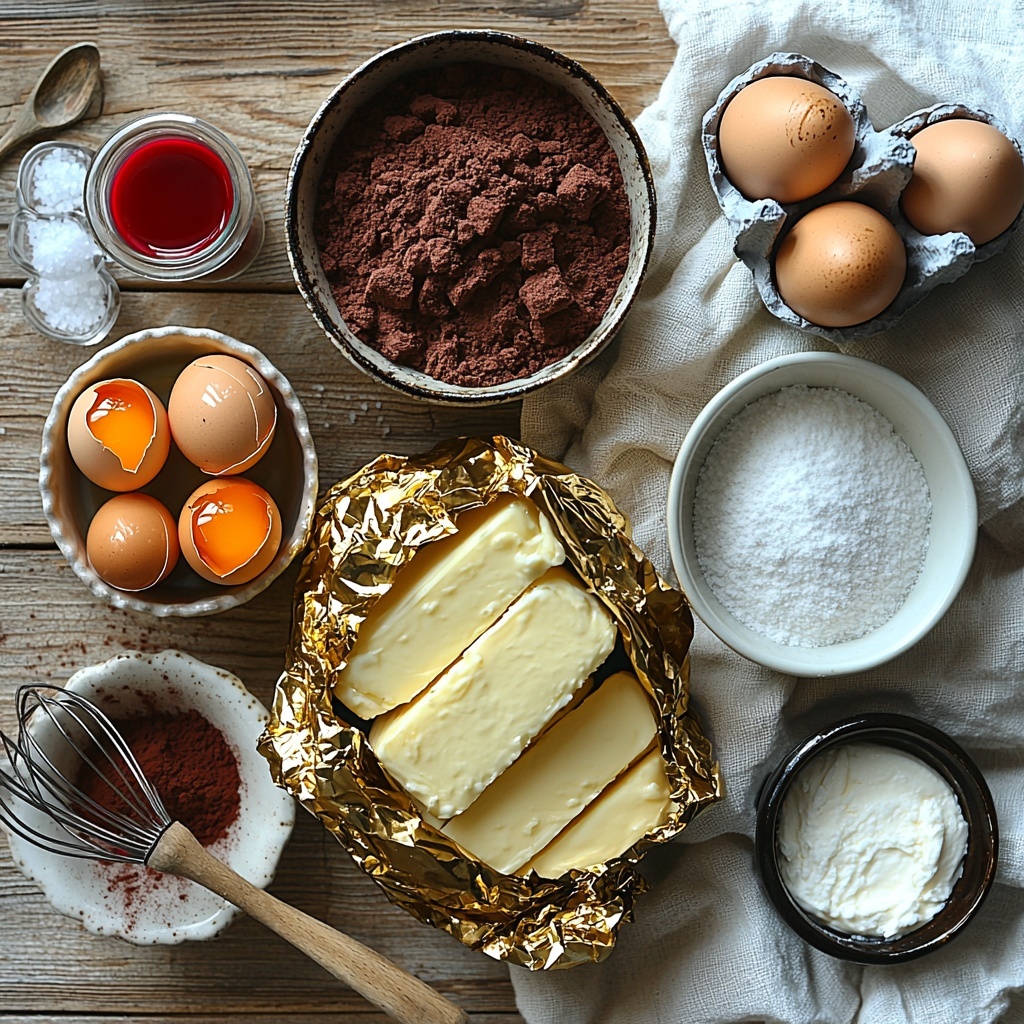
This recipe features simple but essential ingredients that come together to give you that perfect balance of flavor, texture, and color. Each component has a purpose, whether it’s contributing to the vivid red hue, the tender crumb, or the creamy filling that makes these thumbprints so special.
- 1 cup plus 2 tablespoons butter: I prefer Kerrygold unsalted butter for a richer flavor and excellent texture in cookies.
- 1/2 cup brown sugar: Packed firmly to add moisture and an irresistible caramel note.
- 1/4 tsp salt: Enhances all the flavors and balances sweetness.
- 1 egg yolk (room temperature): Provides richness and helps the cookie stay tender.
- 1 tsp vanilla extract: A subtle hint of warmth to round out the taste.
- 2 cups all-purpose flour: King Arthur all-purpose flour works wonderfully for the best texture.
- 4 tsp red food coloring: For that signature, vibrant red velvet look.
- 3 tsp cocoa powder: Adds the classic cocoa flavor that defines red velvet.
- 1/2 cup granulated sugar: Used for rolling to give the cookies a slight, sugary crunch.
- 5 oz cream cheese: Philadelphia original cream cheese gives the filling great stability and luscious flavor.
- 1 egg yolk: Adds richness to the cream cheese filling.
- 1/4 cup sugar: Sweetens the cream cheese filling perfectly.
- 1/8 tsp salt: Balances the flavor in the cream cheese mix.
- 1/4 tsp vanilla extract: Enhances the filling’s depth and sweetness.
How to Make Simple Red Velvet Cream Cheese Thumbprint Cookies Recipe
Step 1: Cream the Butter and Sugars
Start by beating the butter and brown sugar together until the mixture is light and fluffy. This step is crucial because it creates the perfect texture for your cookies, ensuring they turn out tender and melt-in-your-mouth.
Step 2: Add Egg Yolk and Vanilla
Mix in the room temperature egg yolk and vanilla extract. The egg yolk provides richness while the vanilla adds a fragrant background note that complements the red velvet flavor beautifully.
Step 3: Combine Dry Ingredients
In a separate bowl, whisk together the all-purpose flour, cocoa powder, red food coloring, and salt. Combining these dry ingredients thoroughly prevents uneven color and flavor in the dough.
Step 4: Mix Dry and Wet Ingredients
Gradually add the dry mixture to the butter mixture, combining just until the dough comes together. Over-mixing can make the cookies tough, so be gentle and patient.
Step 5: Prepare the Cream Cheese Filling
In another bowl, beat the cream cheese with the egg yolk, sugar, salt, and vanilla extract until completely smooth and creamy. This luscious filling provides the perfect tangy contrast to the cocoa-flavored cookies.
Step 6: Shape and Fill the Cookies
Roll the dough into balls and then gently press your thumb or a small spoon into the center to create an indentation. Fill each indentation with a dollop of the cream cheese filling—don’t be shy here, as it’s the star of the show!
Step 7: Roll in Granulated Sugar and Bake
Lightly roll each cookie in granulated sugar before placing them on a lined baking sheet. This provides a delicate crunch and an attractive coating. Bake in a preheated oven at 350°F (175°C) for about 12-15 minutes until the edges are just set but the cookies remain soft.
Step 8: Cool and Enjoy
Allow the cookies to cool on the baking sheet for a few minutes before transferring to a wire rack. Cooling helps the cream cheese filling set slightly, ensuring each bite is as delicious as the first.
How to Serve Simple Red Velvet Cream Cheese Thumbprint Cookies Recipe
Garnishes
A light dusting of powdered sugar or a drizzle of melted white chocolate adds an elegant touch that makes these cookies look extra special. Fresh berries can also be placed atop the cream cheese filling for a pop of color and juicy freshness.
Side Dishes
These cookies pair wonderfully with a hot cup of coffee or a creamy latte. For a more indulgent treat, serve them alongside a scoop of vanilla ice cream or a glass of cold milk—the perfect companions to balance the rich cream cheese filling.
Creative Ways to Present
Serve these delightful thumbprint cookies on a beautiful platter lined with parchment paper or in a decorative tin for gifting. You can even create cookie stacks tied with festive ribbons for a charming homemade gift that’s sure to impress anyone lucky enough to receive it.
Make Ahead and Storage
Storing Leftovers
Store any leftover cookies in an airtight container at room temperature for up to 3 days. For the best texture, avoid refrigerating as it can cause the cookies to dry out slightly and the cream cheese filling to firm up too much.
Freezing
You can freeze these thumbprint cookies either before or after baking. Freeze the dough balls on a tray first, then transfer to a freezer bag. Baked cookies keep well in a sealed container for up to one month in the freezer, perfect for planning ahead!
Reheating
To enjoy thawed cookies at their best, warm them slightly in a preheated oven at 300°F (150°C) for 5 minutes. This refreshes their softness and gently melts the cream cheese filling to a lovely consistency.
FAQs
Can I use regular butter instead of Kerrygold?
Absolutely! Regular unsalted butter will work fine, though Kerrygold’s rich flavor really enhances the overall taste of the cookies.
Is it necessary to use red food coloring?
For the signature red velvet appearance, yes. But if you prefer a more natural route, you can experiment with beet juice as a substitute, though it might slightly alter the flavor and color intensity.
Can I make the cream cheese filling dairy-free?
Yes, you can substitute regular cream cheese with a dairy-free alternative. Just choose one that is firm and creamy for the best texture in your thumbprint cookies.
How do I prevent the cookies from spreading too much?
Make sure the dough is well-chilled before baking and avoid over-creaming the butter and sugar. These steps help maintain the cookie’s shape and prevent excessive spreading.
Can this recipe be doubled or halved easily?
Definitely! This Simple Red Velvet Cream Cheese Thumbprint Cookies Recipe scales well, so whether you want a small batch or want to bake for a crowd, just adjust the ingredients accordingly.
Final Thoughts
This Simple Red Velvet Cream Cheese Thumbprint Cookies Recipe is the kind of treat that brings a smile with every bite. It’s easy enough to make on a whim but special enough to make into a memorable tradition. So grab those simple ingredients, put on your favorite baking playlist, and get ready to fall in love with these irresistible cookies. Trust me, once you do, you’ll want to share them with everyone you know!
Print
Simple Red Velvet Cream Cheese Thumbprint Cookies Recipe
- Prep Time: 20 minutes
- Cook Time: 15 minutes
- Total Time: 50 minutes
- Yield: 4 servings (approximately 12-16 cookies)
- Category: Dessert
- Method: Baking
- Cuisine: American
Description
Delight in these Simple Red Velvet Cream Cheese Thumbprint Cookies, featuring a rich, buttery red velvet base with a luscious cream cheese filling. Perfectly soft and moist with a subtle cocoa flavor, these cookies combine classic flavors with an easy-to-follow recipe that yields a sweet treat ideal for any occasion.
Ingredients
Cookie Dough
- 1 cup plus 2 tablespoons unsalted butter, softened (preferably Kerrygold for a richer flavor)
- 1/2 cup firmly packed brown sugar
- 1/4 teaspoon salt
- 1 egg yolk (room temperature, about 70°F)
- 1 teaspoon vanilla extract
- 2 cups all-purpose flour (King Arthur recommended)
- 4 teaspoons red food coloring
- 3 teaspoons cocoa powder
- 1/2 cup granulated sugar (for coating)
Cream Cheese Filling
- 5 ounces cream cheese (Philadelphia original for best stability)
- 1 egg yolk
- 1/4 cup sugar
- 1/8 teaspoon salt
- 1/4 teaspoon vanilla extract
Instructions
- Prepare the Cream Cheese Filling: In a medium bowl, beat together the cream cheese, egg yolk, sugar, salt, and vanilla extract until smooth and creamy. Set aside in the refrigerator to chill while preparing the cookie dough.
- Make the Cookie Dough: In a large bowl, cream the softened butter and brown sugar together until light and fluffy. Add in the egg yolk and vanilla extract, mixing until fully incorporated. In a separate bowl, sift together the all-purpose flour, cocoa powder, and salt. Gradually add the dry ingredients to the wet mixture, mixing just until combined. Stir in the red food coloring evenly to get a vibrant red velvet color.
- Shape and Chill Dough: Shape the dough into 1-inch balls and roll each ball in granulated sugar to coat. Place the sugar-coated dough balls on a baking sheet lined with parchment paper. Chill the dough balls in the refrigerator for at least 15 minutes to firm up and reduce spreading during baking.
- Create Thumbprint Indents and Fill: Remove the dough balls from the refrigerator and use your thumb or the back of a spoon to make a small indentation in the center of each cookie. Spoon or pipe the chilled cream cheese filling into each indent, filling slightly but not overflowing.
- Bake the Cookies: Preheat the oven to 350°F (175°C). Bake the cookies on the prepared baking sheet for 12-15 minutes, or until the edges are set and the cream cheese filling is slightly puffed but not browned. Allow cookies to cool on the baking sheet for 5 minutes before transferring to a wire rack to cool completely.
Notes
- Ensure butter and egg yolks are at room temperature for easier mixing and better texture.
- Using high-quality cocoa powder and cream cheese enhances the flavor significantly.
- Chilling dough balls before baking helps maintain their shape and prevents excessive spreading.
- Store baked cookies in an airtight container in the refrigerator for up to 5 days due to the cream cheese filling.
- For a festive touch, sprinkle a small amount of additional cocoa powder or powdered sugar before serving.


