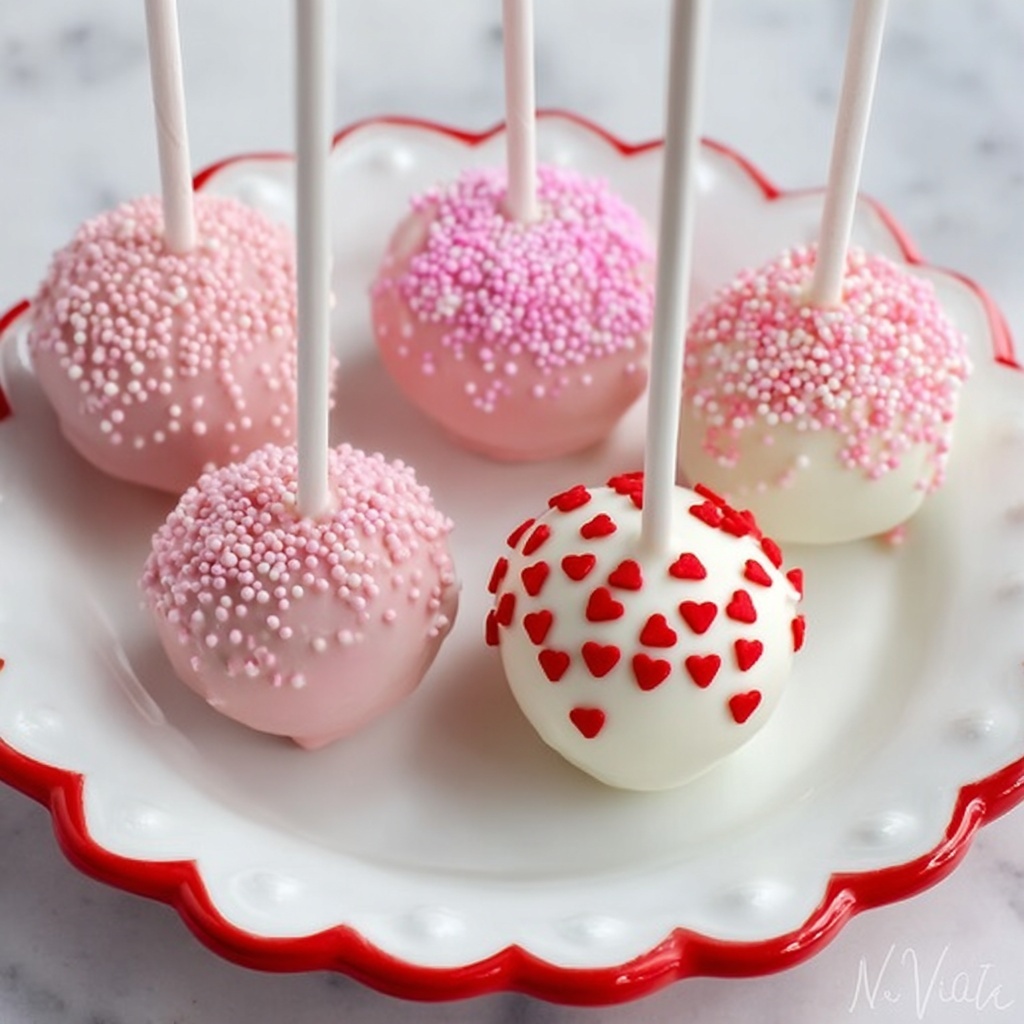
If you’re looking to add a burst of berry-flavored fun to your dessert lineup, I have just the thing for you: the Strawberry Cake Pops Recipe. These adorable little treats are not only irresistibly delicious but also bring a perfect balance of moist strawberry cake and creamy frosting, all wrapped in a glossy, colorful coating. Whether you’re celebrating a special occasion or just want to brighten your day, these pops will steal the show with their charming look and incredibly satisfying taste.
Ingredients You’ll Need
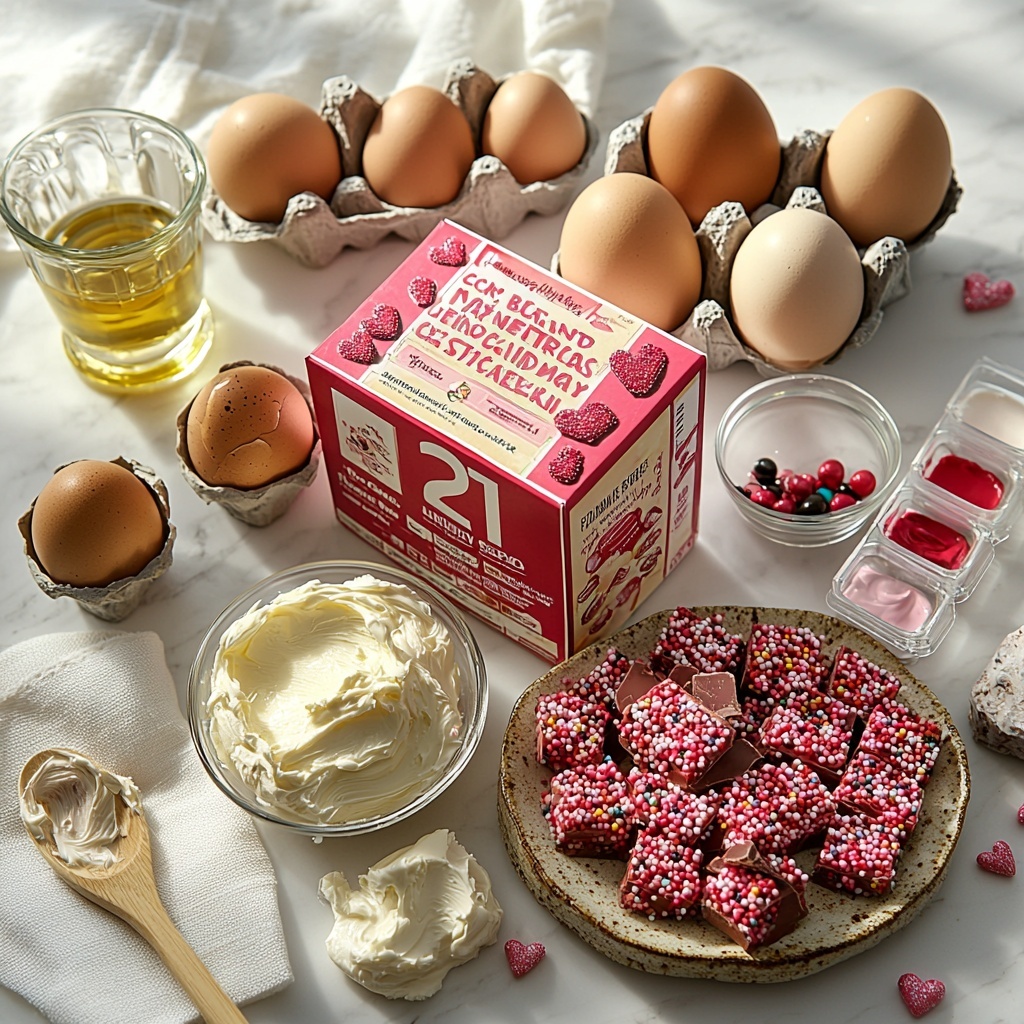
The magic behind the Strawberry Cake Pops Recipe is in its simple yet essential ingredients. Each one plays a special role—from providing that classic strawberry flavor to giving the cake pops their moist texture and smooth coating. Having these on hand will make the process straightforward and immensely rewarding.
- Strawberry cake mix: The foundation for our pops, offering that sweet, fruity flavor everyone loves.
- Water: Necessary for hydrating the cake mix so it bakes perfectly moist.
- Vegetable or canola oil: Adds tenderness and keeps the cake from drying out.
- Eggs: Help bind the cake together while giving it structure and richness.
- White, vanilla, or cream cheese frosting: Acts as the glue that holds the cake crumbs together, making shaping much easier.
- Vanilla melting chocolate or almond bark: For that silky coating that adds sweetness and a beautiful finish.
- Pink or red food coloring gel: To tint half the coating and evoke that lovely strawberry vibe.
- Valentine’s Day sprinkles: Optional but perfect for adding a festive touch and a little crunch.
How to Make Strawberry Cake Pops Recipe
Step 1: Prepare the Cake
Start by baking your strawberry cake from the box mix according to the instructions. Combining the cake mix, water, oil, and eggs carefully ensures a moist and flavorful base. Pour the batter evenly into a 9×13-inch pan and pop it into the oven. The aroma that fills your kitchen will have you excited for what’s to come.
Step 2: Cool the Cake Completely
Patience is key here! Let the cake cool entirely after baking. This step makes sure the cake holds its shape when crumbled and mixed later. Handling slightly warm cake can be tricky and messy, so giving it time really pays off.
Step 3: Crumble the Cake
Once cooled, crumble the cake into fine crumbs using a fork or your hands. Getting an even texture here helps the cake pops form nicely without lumps or big chunks, creating a smooth, uniform bite.
Step 4: Mix in Frosting
Add two tablespoons of frosting to the cake crumbs and mix thoroughly. This mixture should hold together like dough, so add a little more frosting if necessary. This step is where your cake transforms from loose crumbs into the perfect shapeable base for your pops.
Step 5: Form Cake Balls
Roll the mixture into 1-inch balls and set them on a parchment-lined baking sheet. This size is perfect—a bite or two of pure strawberry delight. Keep them uniform so they bake evenly and look picture perfect.
Step 6: Insert Sticks and Chill
Melt a bit of your vanilla melting chocolate and dip the tip of each cake pop stick before inserting it into the balls. This ‘glue’ keeps the stick secure. Refrigerate the pops for about an hour to firm up, making them easier to coat later.
Step 7: Color and Coat the Cake Pops
Melt the remaining coating chocolate and split it into two bowls—leave one as is and add the pink or red gel to the other. Dip each cake pop into the chocolate fully, then scrape off excess. Place the pops upright in a holder or foam to set.
Step 8: Decorate and Chill Again
Before the chocolate hardens, shower your cake pops with Valentine’s Day sprinkles to add a festive burst of color and texture. Allow the coating to fully harden at room temperature, then chill them until it’s time to enjoy.
How to Serve Strawberry Cake Pops Recipe
Garnishes
Adding garnishes like colorful sprinkles or even edible glitter elevates the presentation instantly. Fresh strawberry slices on the side can amplify the berry theme and add natural sweetness that pairs perfectly with the cake pops.
Side Dishes
Pair these strawberry cake pops with light accompaniments such as a creamy vanilla mousse or a simple fruit salad to balance the richness of the cake pops. A glass of chilled sparkling lemonade also complements the fruity flavors beautifully.
Creative Ways to Present
Display your cake pops in a decorated foam block wrapped in a festive cloth or set inside a pretty basket filled with shredded paper filler. Wrapping each pop in cellophane tied with a ribbon makes for an adorable gift or party favor that everyone will adore.
Make Ahead and Storage
Storing Leftovers
Keep any leftover Strawberry Cake Pops Recipe treats fresh by storing them in an airtight container. They do well in the refrigerator for up to 5 days, allowing you to enjoy these sweet bites without rush.
Freezing
If you want to save them for even longer, freeze your cake pops on a tray first and then transfer them to a sealed freezer bag. Properly stored, they last for up to 2 months without losing that delightful flavor and texture.
Reheating
Since cake pops are best enjoyed chilled or at room temperature, there’s no need to reheat. Just allow frozen pops to thaw in the fridge overnight for a perfect treat whenever you’re ready.
FAQs
Can I use homemade strawberry cake instead of mix?
Absolutely! Using homemade strawberry cake can add a personal touch, and as long as it’s moist and flavorful, it works wonderfully in the Strawberry Cake Pops Recipe.
What if I don’t have melting chocolate or almond bark?
You can substitute with good-quality white chocolate chips, but be cautious to temper them properly for a smooth, shiny coating that hardens well.
How do I prevent the cake pops from falling off the sticks?
Dipping the stick tips in melted chocolate before inserting acts as a glue that secures them firmly. Plus, chilling the cake pops afterward helps maintain their shape.
Can I make these dairy-free or vegan?
With some ingredient swapping, such as using a dairy-free cake mix, vegan frosting, and dairy-free chocolate coatings, you can adapt this recipe to meet those needs.
How long do Strawberry Cake Pops last at room temperature?
They can safely sit out for a few hours, making them perfect for parties and events, but it’s best to refrigerate any leftovers to keep them fresh.
Final Thoughts
There’s something truly joyful about making and sharing this Strawberry Cake Pops Recipe with your friends and family. It’s a simple yet show-stopping dessert that transforms ordinary cake into bite-sized happiness. Give it a try—you’ll love how easy it is to create these sweet, colorful treats that brighten every gathering and bring out smiles all around.
Print
Strawberry Cake Pops Recipe
- Prep Time: 20 minutes
- Cook Time: 30 minutes
- Total Time: 1 hour 50 minutes
- Yield: 22 servings
- Category: Dessert
- Method: Baking
- Cuisine: American
Description
Delightfully sweet strawberry cake pops made from moist strawberry cake mix, coated in creamy vanilla melting chocolate tinted with pink or red food coloring, and adorned with festive Valentine’s Day sprinkles. Perfect bite-sized treats for parties or celebrations.
Ingredients
Cake
- 1 package strawberry cake mix
- 1 cup water
- 1/2 cup vegetable oil or canola oil
- 3 large eggs
Frosting and Coating
- 2 tablespoons canned white, vanilla, or cream cheese frosting
- 20 ounces vanilla melting chocolate or almond bark
- Pink or red food coloring gel (for half of the cake pops)
- Valentine’s Day sprinkles
Instructions
- Prepare the Cake: Preheat your oven according to the cake mix package instructions. In a mixing bowl, combine the strawberry cake mix, water, oil, and eggs. Mix thoroughly until well blended. Pour the batter into a greased 9×13-inch baking pan and bake as directed on the package.
- Cool the Cake: Once baked, remove the cake from the oven and allow it to cool completely on a wire rack. Cooling fully ensures the cake is easy to crumble and handle without becoming mushy.
- Crumble the Cake: Transfer the cooled cake into a large mixing bowl. Using a fork, crumble it into fine crumbs to prepare for combining with frosting.
- Add Frosting and Mix: Add 2 tablespoons of your chosen white, vanilla, or cream cheese frosting to the cake crumbs. Use your hands or an electric mixer to thoroughly mix until the mixture holds together and forms a dough-like ball. Add a bit more frosting if needed to reach the right consistency.
- Form Cake Balls: Roll the cake mixture into 1-inch diameter balls using your hands. Place them on a baking sheet lined with parchment paper to keep them from sticking.
- Insert Sticks: Melt a small amount of the vanilla melting chocolate or almond bark in the microwave. Dip the tip of each cake pop stick into the melted chocolate, then insert it halfway into each cake ball. This anchors the stick inside the cake pop. Refrigerate the pops for 1 hour to firm up.
- Color the Coating: Melt the remaining melting chocolate or almond bark in the microwave until smooth. Divide the melted chocolate into two separate bowls. Add pink or red food coloring gel to one bowl and stir until evenly tinted to your desired shade.
- Coat the Cake Pops: Dip each chilled cake pop into the melted chocolate to fully coat it. Gently scrape off excess coating on the side of the bowl to avoid drips. Place the coated pops upright in a holder or foam base to allow the chocolate shell to harden.
- Decorate and Chill: Before the coating hardens completely, quickly sprinkle Valentine’s Day themed sprinkles on the cake pops to decorate. Allow the coating to fully set, then chill the cake pops in the refrigerator until ready to serve.
Notes
- Make sure the cake is fully cooled before crumbling to avoid a soggy mixture.
- If the cake pop mixture feels too dry, add frosting a teaspoon at a time to achieve proper consistency.
- Use a cake pop stand or foam base to keep the pops upright while coating and drying.
- You can use any color food gel to customize cake pop coating colors for different occasions.
- Store finished cake pops in an airtight container in the refrigerator for up to 5 days.


